We already knew that Microbit has 25 (5x5) LEDs display on it. Now, by using Keyestudio Digital white LED Module and Microbit sensor V2 shield, we can control LED to blink, too.
First step is turn off the LEDs on the Microbit.
First step is turn off the LEDs on the Microbit.
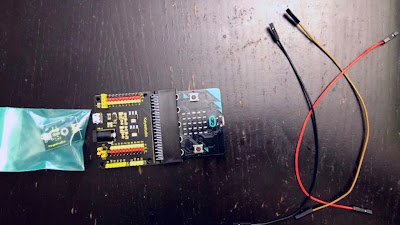
Materials you need:
MicrobitKeyestudio Microbit Sensor V2 shield
USB Cable
Keyestudio Digital White LED Module
Female-female jumper wires (3)
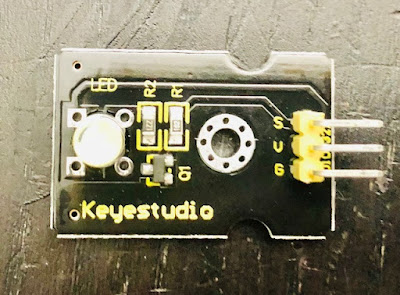
Keyestudio Digital White LED Module
This LED Module can be used for light interactive projects. The spec of this module are:
Type: Digital
PH2.54 socket
Size: 30*20mm
Schematic:
How to:
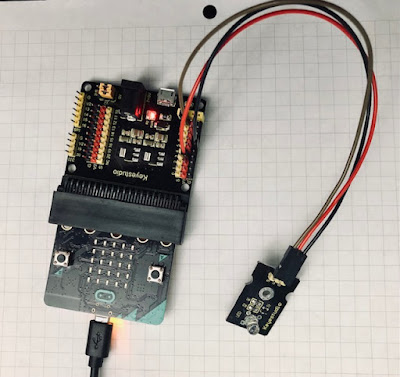
Put Microbit into Keyestudio Microbit Sensor V2 shield. Plug LED module to Microbit Sensor shield. By using jumper wires, connect as follows:
1. Pin S in LED module to pin 9 in Signal in Sensor shield.
2. Pin + in LED module to Pin V1 in Sensor shield.
3. Pin - in LED module to Ground in Sensor shield.
Put Some Codes
Construct codes using Block Code through Microsoft Makecode.
Here I share my code in Makecode:
https://makecode.microbit.org/_7g5gwe8z5Cpz
Test the Code
Now plug the USB cable to Microbit and the result is LED will blink twice with sleep interval 1.5 seconds, and it always repeats.
Other project version without Keyestudio Extension
Without extension, pins that can be used in Microbit are pin 0, 1, and 2. so the different with the code is change the pin number. Previously, we use pin 9. Now, change it to pin 0. The rest of the code is the same with the project above.


No comments:
Post a Comment
Please kindly give nice comment that can improve our website in the future.
Thank you.
Regards,
DIY4 Pro